
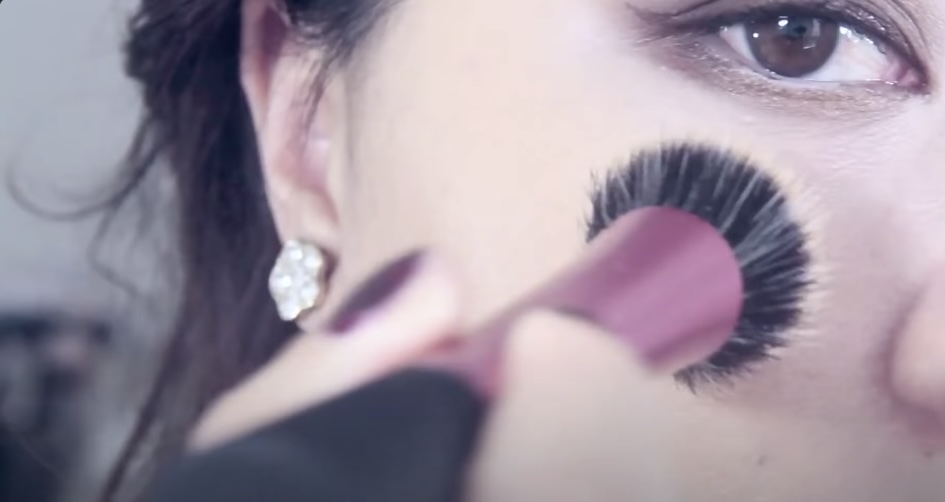
Ever wondered what is a stippling brush and why it’s a favorite in the makeup world? A stippling brush is a versatile tool that’s become indispensable for many makeup enthusiasts and professionals alike. Characterized by its unique two-tiered bristles – typically a combination of dense, short bristles at the base and longer, finer bristles at the top – this brush is designed for an airbrushed, flawless finish.
Anatomy of a Stippling Brush
Understanding what makes a stipple brush distinct can help you utilize it effectively. The key components include:
Bristle Type: The Backbone of a Stippling Brush
The bristle type of a stippling brush is a fundamental factor that significantly impacts its performance and versatility. Stippling brushes are typically crafted using a blend of synthetic and natural fibers, creating a unique synergy of advantages:
| Feature | Synthetic Bristles | Natural Bristles |
| Consistency in Texture and Density | Offer uniformity in texture and density, ensuring a predictable makeup application every time. | – |
| Ideal for Specific Products | Excel in applying liquid and cream makeup products, seamlessly blending them into the skin. | Renowned for their ability to pick up and distribute powder products evenly. |
| Suitability for Skin Types | – | Provide a gentle and luxurious feel during application, suitable for sensitive skin. |
| Ethical Considerations | Often preferred by individuals seeking cruelty-free and vegan makeup tools. | – |
| Blending Capability | – | Prized for their blending prowess, allowing for seamless transitions between colors and products. |
The fusion of synthetic and natural bristles in stippling brushes empowers users to switch seamlessly between various makeup products and achieve diverse finishes, ranging from a matte powder look to a dewy, radiant complexion.
Bristle Length: The Art of Dual-Length Design
One of the defining features of stippling brushes is their dual-length bristles, which contribute significantly to their unique makeup application capabilities. Stippling brushes are distinguished by their longer bristles that delicately graze the skin’s surface. This design imparts several advantages:
- Controlled Application: The combination of shorter and longer bristles allows for precise control over product placement and blending.
- Light Touch: The longer bristles ensure a gentle and feather-light touch on the skin, minimizing the risk of over-application and product caking.
- Airbrushed Finish: Stippling brushes with dual-length bristles are celebrated for their ability to create an airbrushed finish, a coveted effect among makeup enthusiasts and professionals alike.
This dual-length bristle design transforms the stippling brush into a versatile tool capable of achieving various makeup finishes. Whether you aim for a sheer, natural look or dramatic, flawlessly blended contours, the stippling brush’s bristle length plays a pivotal role in achieving your desired outcome.
Handle: Ergonomics Meets Durability
The handle of a stippling brush is not just an aesthetic consideration; it’s a vital component designed with the user’s comfort and ease of application in mind. The following aspects highlight the significance of an ergonomically designed handle:
- Ease of Use: Ergonomically shaped handles provide a comfortable grip, facilitating precise and effortless makeup application. The brush becomes an extension of your hand, allowing for intuitive movements.
- Control: A well-structured handle enhances control over the brush’s movement, making it easier to achieve intricate makeup looks and meticulous blending.
- Durability: High-quality stippling brushes often feature sturdy handles constructed to withstand regular use and maintain their integrity over time, ensuring longevity in your makeup kit.
Uses of a Stippling Brush in Makeup
The stippling makeup brush is a multitasker. Here’s how it can be used:
Foundation Application
One of the primary uses of a stippling brush is for applying foundation. This brush excels at creating a seamless, airbrushed finish that appears both flawless and natural. Here’s how to use it effectively:
- Prepare Your Skin: Start with a clean and moisturized face. Apply a makeup primer if desired for a smoother canvas.
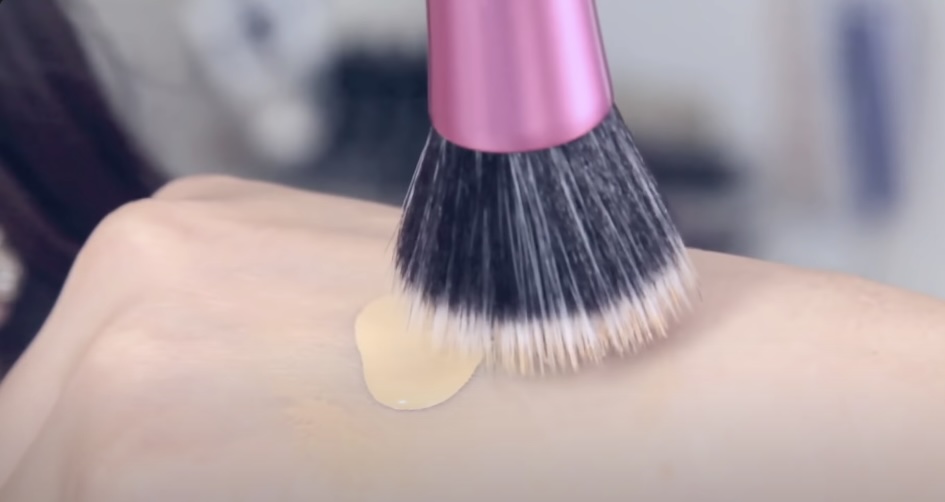
- Dot Foundation: Use the back of your hand or a palette to apply a tiny amount of liquid or cream foundation.
- Dab and Swirl: Dip the stippling brush into the foundation and gently dab it onto your skin. Avoid using too much pressure, as stippling brushes are designed for a light touch.
- Circular Motion: Use a circular motion to blend the foundation evenly across your face. The stippling brush’s dual bristle structure helps in achieving a flawless, airbrushed finish without streaks.
- Build Coverage: Just keep going until you’ve covered all the bases, paying special care to the spots that require it. To achieve a dewy, natural look, apply foundation layers gradually using the stippling brush.
Blush and Bronzer
Stippling brushes are not limited to foundation; they are also excellent tools for applying blush and bronzer with finesse. Here’s how to use them for these purposes:
| Step | Blush Application | Bronzer Application |
| 1. Choose Your Product | Select your preferred blush shade, whether it’s powder or cream. | Select your preferred bronzer shade, whether it’s matte or shimmer. |
| 2. Brush Preparation | Lightly dip the stippling brush into the blush product. | Lightly dip the stippling brush into the bronzer product. |
| 3. Remove Excess | Gently tap off any excess product to avoid overly intense color. | Similar to blush, tap off any excess bronzer to avoid an overly bronzed appearance. |
| 4. Application | To achieve a dewy, diffused effect, dab some blush onto your cheekbones with the stippling brush and blend it in a circular motion. | Apply bronzer to your cheekbones, jawline, and temples using the stippling brush. Mix thoroughly to achieve a dewy, sun-kissed look. |
| 5. Build Intensity | Add more product gradually until you achieve the desired level of color intensity. | Adjust the bronzer intensity by adding more product gradually until you achieve the desired sun-kissed effect. |
Highlighter
Stippling brushes can also be employed for a delicate and subtle application of highlighter, resulting in a radiant and glowing complexion. Here’s how to use them for this purpose:
- Choose Your Highlighter: Pick your favorite highlighter, whether it’s in powder, cream, or liquid form.
- Dab and Swirl: Gently dip the stippling brush into the highlighter product, ensuring you pick up a minimal amount.
- Apply to High Points: Lightly apply the highlighter to the high points of your face, including the tops of your cheekbones, the bridge of your nose, your cupid’s bow, and the inner corners of your eyes.
- Blend Effortlessly: Use a gentle swirling or tapping motion to blend the highlighter seamlessly into your skin. The stippling brush’s soft, top bristles ensure a subtle and natural-looking glow.
Techniques for Mastering the Stipple Brush
Mastering the stippling makeup brush requires specific techniques:
Dabbing Technique
Dabbing is one of the fundamental techniques for using a stippling brush. It involves gently pressing the brush onto the skin without dragging it. This technique is particularly useful for applying products like liquid foundation, cream blush, or highlighter. Here’s a breakdown of the key steps involved in the dabbing technique:
- Prepare Your Skin: Start with clean, moisturized skin. Apply your skincare products, such as moisturizer and primer, before using the stippling brush.
- Product Application: Dispense a small amount of your chosen makeup product onto the back of your hand or a makeup palette.
- Load the Brush: Dip the stippling brush into the product, ensuring that only the tips of the bristles pick up the product.
- Dabbing Motion: Gently dab the brush onto your skin in the areas where you want to apply the makeup product. Avoid dragging the brush to prevent streaks or uneven coverage.
- Build Gradually: If you desire more coverage, repeat the dabbing motion, gradually building up the product until you achieve the desired effect.
- Blend: After applying the product, use the stippling brush to blend and feather out the edges for a seamless finish.
Pro Tip: The dabbing technique is excellent for achieving a natural, airbrushed look, as it minimizes the risk of cakiness and unevenness.
Circular Motions for Blending
Circular motions are another essential technique when using a stippling brush, especially for blending makeup. This technique is effective for blending foundation, concealer, and even powder products. Here’s how to master circular motions:
- Foundation Application: Apply your liquid or cream foundation using the dabbing technique mentioned earlier.
- Circular Blending: Once the foundation is applied, use the stippling brush to blend it into your skin. Instead of dabbing, make small, light circles with the brush. This motion helps distribute the product evenly and ensures a seamless blend.
- Targeted Areas: Pay attention to areas where you need extra coverage or blending, such as around the nose, under the eyes, and along the jawline. Continue using circular motions until the foundation is well-blended.
- Product Control: Adjust the pressure and speed of your circular motions to control the coverage and ensure a natural finish.
Pro Tip: Circular motions are excellent for achieving a radiant and even complexion, as they help blend makeup seamlessly while preventing streaks or lines of demarcation.
Layering for Natural Effect
Layering is a technique that involves building coverage gradually to achieve a natural and customizable makeup look. This technique is particularly useful when using a stippling brush with products like blush or bronzer. Here’s how to master the layering technique:
- Product Selection: Choose a blush or bronzer shade that complements your skin tone.
- Initial Application: Dip the stippling brush into the product and tap off any excess.
- First Layer: Apply a light layer of the product to your cheeks or desired areas using the dabbing technique.
- Assess: Take a step back and assess the color intensity. If you want a more pronounced effect, you can proceed to the next layer.
- Additional Layers: Gradually build up the color by adding more layers. Use the dabbing technique and focus on the apples of your cheeks for a natural flush.
- Blend: After achieving the desired color intensity, use circular motions to blend the product seamlessly into your skin.
Pro Tip: Layering allows you to control the intensity of your blush or bronzer, ensuring a subtle, natural effect that can be customized to your preference.
Choosing the Right Stippling Brush
When selecting what stippling brush to buy, consider:
Bristle Quality
One of the primary factors to evaluate when choosing a stippling brush is the bristle quality. The bristles of the brush play a pivotal role in how it performs and feels on your skin. Here’s a breakdown of what to look for:
| Aspect | Description |
| Softness | Opt for bristles that are soft on your skin to prevent irritation. Soft bristles also ensure a smooth makeup application. |
| Durability | Durable bristles are essential to ensure the brush’s longevity. They should withstand regular use and cleaning without shedding excessively. |
| Synthetic vs. Natural | Consider whether you prefer synthetic or natural bristles. Synthetic bristles are cruelty-free and work well with liquid and cream products, while natural bristles are best for powder products. |
Size Matters
The size of the stippling brush is another crucial factor to consider. The right size ensures that the brush is suitable for your facial features and makeup application needs. Here’s a guideline for selecting the appropriate size:
| Face Shape | Ideal Brush Size |
| Round or Oval Face | A medium-sized stippling brush is ideal for even coverage. |
| Heart or Diamond Face | Opt for a smaller stippling brush for precision in targeted areas. |
| Square or Rectangular Face | A larger stippling brush can help provide balanced coverage. |
Additionally, consider the type of makeup you intend to use the brush for. Smaller brushes are excellent for detail work, such as applying blush or highlighter, while larger brushes are suitable for foundation application.
Brand Reputation and Reviews
Before making your final decision, it’s essential to research the brand reputation and read product reviews. This step helps ensure that you are investing in a high-quality stippling brush. Here’s what to keep in mind:
- Brand Reputation: Well-established makeup brands often produce reliable brushes. Research brands known for their quality and commitment to customer satisfaction.
- Product Reviews: Reading product reviews from other users can provide valuable insights into the performance and durability of the stippling brush you are considering. Look for reviews on reputable websites and forums dedicated to makeup enthusiasts.
- Consider Professional Recommendations: If possible, seek recommendations from makeup artists or professionals who have experience using stippling brushes. They can offer valuable guidance based on their expertise.
Care and Maintenance
To keep your stippling makeup brush in top condition:
Regular Cleaning
Regular cleaning is crucial to keep your stippling brush hygienic and free from product buildup. Here’s a detailed breakdown of the cleaning process:
- Gather Supplies: You will need a gentle brush cleanser or mild baby shampoo, a shallow bowl, lukewarm water, and a clean towel or paper towels.
- Prepare the Solution: In the shallow bowl, mix a small amount of the brush cleanser or baby shampoo with lukewarm water. Swirl the brush bristles in the solution to create a lather.
- Cleaning the Bristles: Gently but thoroughly cleanse the bristles by swirling them in the soapy water. Be careful not to submerge the entire brush, as this can weaken the adhesive that holds the bristles.
- Rinse: Rinse the brush under lukewarm running water, continuing to swirl the bristles until the water runs clear, indicating that all makeup residue and cleanser have been removed.
- Excess Water Removal: Gently squeeze out excess water from the brush using your fingers or a clean towel. Be cautious not to pull or twist the bristles, as this can damage them.
- Reshape and Dry: Lay the brush flat on a clean towel or paper towels to air dry. Ensure that the brush is positioned so that the bristles hang off the edge of the surface. This helps maintain the brush’s shape and prevents water from seeping into the handle.
- Drying Time: Allow the brush to air dry completely before using it again. This may take several hours to overnight, depending on the brush size and density.
Proper Storage
Proper storage is essential to protect your stippling brush from dust, dirt, and damage. Here are some storage tips:
- Dry Place: Store your clean stippling brush in a dry, cool place away from direct sunlight. Moisture can lead to mold growth and damage the bristles.
- Brush Holder: Consider using a brush holder or organizer to keep your brushes neatly arranged and protected from external contaminants. This also helps maintain their shape.
- Travel Cases: If you need to transport your stippling brush, invest in a travel case or brush roll to prevent deformation or contamination during travel.
Maintenance Frequency
The frequency of cleaning and maintenance depends on how often you use your stippling brush. Here are some general guidelines:
- Regular Use: If you use your stippling brush daily or frequently, it’s recommended to clean it at least once a week to prevent product buildup and maintain hygiene.
- Occasional Use: For brushes used less frequently, such as those reserved for special occasions, clean them after each use and perform a thorough cleaning every few weeks.
Stippling Brush vs. Other Brushes
Comparing what is a stipple brush with other types:
Stippling Brush
A stippling brush is a versatile makeup tool known for its ability to create a natural and airbrushed finish. It consists of two types of bristles: a dense base and softer, longer bristles on top. Here’s a breakdown of its features and benefits:
| Aspect | Description |
| Application | Ideal for applying liquid and cream products, such as foundation, blush, and highlighter. |
| Coverage | Offers buildable coverage, allowing you to achieve a sheer to full coverage look with ease. |
| Finish | Provides an airbrushed, flawless finish with minimal streaking or cakiness when used correctly. |
| Precision | Offers precision in product placement, making it suitable for detailed work and achieving a natural look. |
Flat Foundation Brush
A flat foundation brush is characterized by its flat, paddle-like shape. It is a popular choice for applying liquid and cream foundations. Here’s how it compares to the stippling brush:
| Aspect | Description |
| Application | Provides quicker and more extensive coverage compared to a stippling brush. |
| Coverage | Can sometimes leave streaks or brush marks if not applied carefully. |
| Finish | Results in a smoother finish when used correctly, but may require more blending to achieve a seamless look. |
| Precision | Less precise than a stippling brush, making it better suited for broader areas like the face rather than detailed work. |
Sponge
A sponge, often referred to as a makeup blender, has gained popularity for its ability to create a flawless finish. Here’s how it compares to the stippling brush:
| Aspect | Description |
| Application | Provides a similar airbrushed effect as a stippling brush and is excellent for liquid and cream products. |
| Coverage | May absorb more product compared to a stippling brush, potentially leading to product wastage. |
| Finish | Offers a seamless finish with minimal streaking and is great for achieving a natural look. |
| Precision | Provides less precision than a stippling brush but is versatile for various makeup application techniques. |
Kabuki Brush
A kabuki brush is a dense, short-bristled brush often used for applying loose or pressed powder products. Here’s how it compares to the stippling brush:
| Aspect | Description |
| Application | Primarily designed for powder products like bronzer, blush, and setting powder. |
| Coverage | Offers a more diffuse and lighter application compared to a stippling brush. |
| Finish | Creates a soft, diffused finish, which is great for setting makeup or achieving a subtle contour. |
| Precision | Less precise than a stippling brush, especially with liquids or creams, but excels with powder products. |
Conclusion
Understanding what is the stippling brush for and how to use it can revolutionize your makeup routine. Its versatility and ability to create a flawless, airbrushed finish makes the stippling brush a must-have tool in any makeup arsenal. Whether you’re a beginner or a seasoned pro, incorporating a stippling brush can elevate your makeup game to new heights.
FAQ
Q: Can I use a stippling brush for powder products?
A: Absolutely! It works great with both liquid and powder products.
Q: How often should I clean my stipple makeup brush?
A: Ideally, clean it after every few uses to maintain hygiene and brush quality.
Q: Is a stippling brush suitable for sensitive skin?
A: Yes, its gentle application is perfect for sensitive skin types.